Creating reusable fake wounds for first aid practice is simple, inexpensive, and fun.
 Here's what you need:
- clear plastic wrap
- flexible caulk - "Big Stretch" works well
- craft paints:
- flesh
- red
- blue
- brown, tan, butterscotch, or similar
- If you want to pump blood out the wounds, you also need:
- 1/4 inch plastic tubing
- reservoir bag
- tube clamp
Here's what you do:
 Lay out a sheet of plastic wrap.
Squirt two strips of caulk side by side.
If including blood, lay a 6-inch piece of tubing between the caulk strips.
 With a finger dipped in water, spread the caulk.
Feather it into the plastic wrap and push the two strips together to create a long mound.
If using blood, cover the tubing.
Smooth the caulk so there are no bumps or chunks.
 Allow the caulk to dry for an hour or more until it is no longer wet.
With a toothpick, add texture to the cut by pricking and pulling bits of the caulk along the cut line.
 Allow the caulk to thoroughly dry - at least overnight.
Paint the cut using the red paint. It's ok to get outside the cut, but be sure to cover the entire area inside the cut.
Allow the paint to dry.
When dry, paint the entire wound up to the edge of the cut with flesh-colored paint. This is easiest because brushing towards the wound has a clean edge so you won't get flesh color inside the wound and you can cover the red paint that got on the skin.
 Cover the entire piece in flesh paint and let it dry.
You may touch up small spots along the edge after the paint is completely dry.
 Once dry, use a scissor to cut the plastic wrap and trim the wound edge.
Use two-sided tape to hold the wound onto the 'victim'.
I found that using two-sided tape was fast and easy but would not stick as well as I'd like.
Another way to make the wounds is to spread the caulk into a thin layer over a long, wide strip of plastic wrap - long enough to wrap around the arm or leg.
When dried, add strips of velcro - one perpendicular strip at the end of the backside and two parallel strips on the front of the other end. This allows an adjustable length.
To increase strength and prevent tearing, add strips of duct tape to the back of the fake wound before sticking on the velcro.
Some examples:
 Turkey drumstick embedded as a compound fracture |
 Broken leg |
 Serious bleeding wound |
 Large bruise, possibly sprained or broken |
 Support a stick in a small mound of caulk to create an embedded object |
 Embedded object |
I also found that hand wounds can be made very nicely on dishwashing gloves. The paint will not stick to the gloves, so you must spread caulking all over the glove and let it dry first - then paint.
 2nd Degree Blistering |
 Severe Cut |
 Gloves can be cut and velcro added to make them more adjustable |
 Rolled up carpet with caulk and paint makes a severed arm for tourniquet practice |
The simplest in fake wounds is to print a picture and tape it in place. They aren't as interesting as moulage but work fine for indicating where a wound exists in first aid training.
Click the images below to show in full size. You can just print them on a color printer, cut out, and tape on for simple, useful fake wounds:
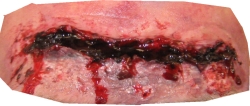 3-inch gash |
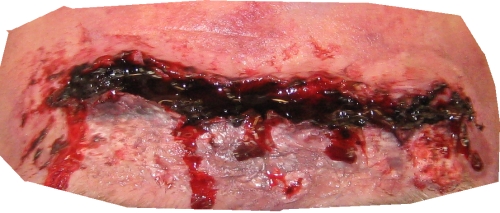 6-inch gash |
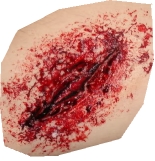 2-inch cut |
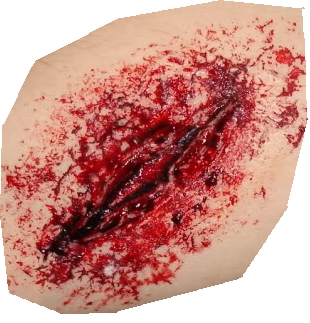 4-inch cut |
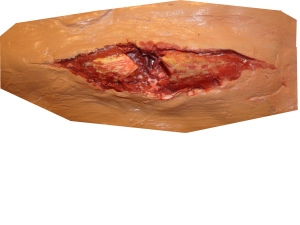 4-inch break |
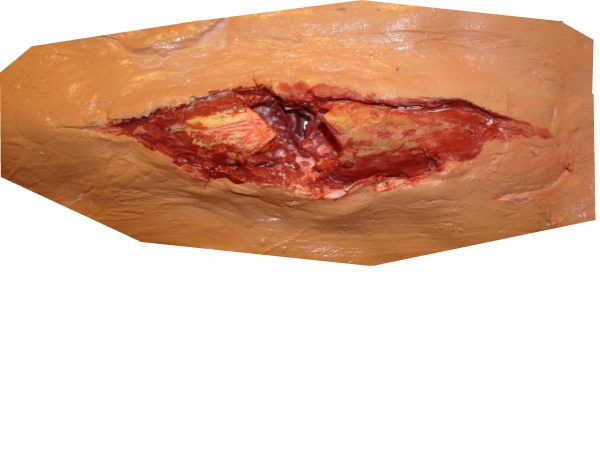 8-inch break |
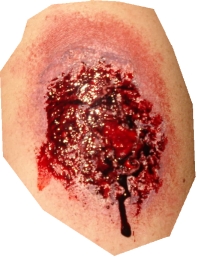 3-inch abrasion |
 6-inch abrasion |
 1-inch puncture wound |
 2-inch puncture wound |
